Tuesday, December 16, 2014

Site Surveying Toys

Chris evaluating site from above.
Last week I joined engineer Chris Rollins and University of Rwanda architecture student Christian "Kara" to do some surveying for a project in Kigali. Chris has done a lot of construction work throughout Africa and has been a great source of information for my UNICEF projects. The construction manual I've drafted is inspired by something similar he produced for projects in South Sudan. During this visit, we were able to play with a number of toys I don't usually have access to. Here's a quick summary with photos of the equipment.

We started off by marking a 10 meter by 10 meter grid pattern over the entire site with flags. Chris brought a Keson MP401E measuring wheel to get the distances, so no need to deal with standard tapes. A measuring wheel makes surveying a site much quicker and easier on the back. We used the same tool to measure distance to services (water, electric, paved road, etc.). It has a pause button on it, so when we'd run up on a large obstacle, we could pause it, move to the side, and restart to continue our reading. The handle folds down and Chris was able to fly with this and the other equipment. Chris is actually pictured in the Keson catalogue using one of these wheels for Engineers Without Borders in Malawi.

Chris using the measuring wheel.
 
Chris centering the bubble.
Once we had the grid laid out, we used a DeWALT DW090PK builders level to take elevations at each point. The builders level was set up at one of our grid points and all other points were measured compared to this point by having somebody stand at the point with the aluminum grade rod to get a reading. Chris will put the points as X, Y, Z coordinates into a spreadsheet, export as comma separated variable file, and import into AutoCAD Civil 3D and create a topographic map of the site, which will later be used to design the building, estimate cut and fill, etc.


Chris on the smart end, Kara holding the grade rod.


Kara trying his hand at the smart end of the level.

Kara about to drop the hammer.
Finally, to evaluate soil conditions, we used a Kessler K-100 dynamic soil penetrometer to get representative samples across the site. The DCP test uses an weighted hammer dropped from a set distance to pound a drive rod into the soil. Once you know the general soil type, the rate of rod penetration is entered into a computer and the CBR (California Bearing Ratio) value for the soil at different depths is given. CBR is a penetration test for evaluating the load bearing capacity of soils originally developed for road construction by the California Department of Transportation. Crushed California limestone is the reference value with a CBR of 100. Our site was getting values between 4 and 40 depending on where and how deep we were testing. These values will influence building foundation design and influence what type of construction can be built on site. This is the first time I've seen the DCP in use and I can think of many times when it would have been useful for one of my projects, especially those that have a lot of cut and fill (almost all projects in Rwanda, "Land of 1,000 Hills"). It would be good to sample un-disturbed soil and then compare that to the compacted backfill to make sure we get sufficient compaction to avoid settling and cracking concrete. The Kessler version we used even comes in a durable Pelican carrying case, perfect for flying around Africa.

Chris explaining the DCP.

Kara dropping hammer, Chris entering values into computer.

All of the survey data collected will be used to develop site plans for the client. Having accurate data means they'll know exactly what they're getting into if they choose to move forward. I've "surveyed" dozens of project in Rwanda, but this was the most thorough to date and had the best toys by far. Thanks Chris and Kara.

Monday, November 24, 2014

Making Gravel

In order to make concrete, first you need aggregate (gravel). At all of my projects in Rwanda, this means getting a delivery of large rocks and chipping away with a hammer until you get a pile of small rocks. They usually set the rocks on a circular pillow made of woven grass (the same pillows they use to carry stones on their heads). It is typically women and older men that get gravel duty, though this time there was also a younger man. This video is from a visit to the Mugombwa refugee camp on November 20, 2014. The aggregate will be used in construction of an early childhood development center (pre-school).

Wednesday, September 3, 2014

Site Clearing a Big Rock

Site clearing for the new Early Childhood Development & Family Centre in Mbuye Sector, Ruhango District (Rwanda). Unfortunately, there is a big rock in the top part of the site, much of which has to be removed. Very slow and strenuous work. Here's a video showing some of the effort. Not too much mechanical equipment (like jack hammers) in Rwanda.
 

Wednesday, August 6, 2014

Biking in Rwanda

Despite the challenges associated with biking in the "Land of 1000 Hills", bikes are still a very popular choice for commuting, catching a tax, and transporting goods. Here's a shot of some bikes parked while people attend a meeting during umaganda in Mbuye Sector, Ruhango District.


One way to get over the challenges of biking up steep hills with a single speed is to hitch a ride from a slow (relatively) moving truck, which everybody does. Of course, going downhill is relatively easy - dangerous, but easy.


Most ex-pats are comfortable riding on the dirt roads or foot paths (some of the best single-track in the world), but riding on the paved roads is not for the feint of heart as there is very little awareness of bikers by Rwandan drivers. I've seen a number of bloody (more than one fatal) accidents. The roads are narrow and people don't give bikers (or motos for that matter) room when passing. As Kigali increases from just over a million people to 2 million (2020 projection) and eventually 4 million (2040 projection) it would be great to find ways to encourage biking and make it safer and more convenient for those that do.

Thursday, July 17, 2014

RYACA "Dufashe Isi / Let's Save the World" Video

Here's a video on protecting the environment done by RYACA (Rwanda Youth Alliance for Climate Actions). I helped them prepare proposals / grant applications and reviewed the lyrics. Turned out great. Congratulations everybody, especially Landry Ndriko Mayigane, who really drove the project. Funding from US Embassy.
 

 https://www.youtube.com/watch?v=EmEyBuvJaww

Monday, July 14, 2014

Community Engagement Exercise

On June 28th, we held a community charrette for a new Early Childhood Development and Family Centre in Mbuye Sector, Ruhango District. The event was organized as part of “umaganda”, the monthly day of service that occurs on the last Saturday of every month across Rwanda. We started with two hours of community work to start leveling the site and prepare it for construction. Approximately 300 people, mostly men, showed up to work each with his own shove, hoe, or rake. The architects and myself had already staked out the site and were around to help direct the work as well as lend a hand with the digging. There is about 5 meters of elevation change from the top of the site to the bottom, which is about 25 meters away. The community is going to remove 2.5 meters from one side and add it to the other side before construction starts. The district will hire a contractor to build retaining walls at the top and bottom of the slope and then UNICEF will execute construction of the facility via an agreement with a partner organization.


After site leveling, we gathered for some dancing and then community engagement activities. UNICEF partnered with Imbuto Foundation to assist with these activities and they started by explaining the idea of the Early Childhood Development and Family Centre, which incorporate health, nutrition, and sanitation programmes to benefit young children, their families, and the community at large. When complete, the centres will belong and be operated by the community, with support from UNICEF and Imbuto for training and developing an operating plan.

Once Imbuto explained the goal of the project, the architecture firm ASA described the current design using a wooden model as a visual aid. Since the site provided is long and narrow, the seven buildings will have to be oriented in an S-shape instead of the circular orientation used in areas with larger sites. The idea is to provide three stimulation rooms for the young children (ages 0 to 6), a covered multipurpose room, demonstration kitchen with storage area, an administration building with two offices, and an “ecosan” toilet that separates solids from liquids and uses both as soil amenities. The entire site is fenced in to provide security and children are provided with custom playground equipment. Rainfall from the roofs of all buildings are piped to a 30,000 liter underground masonry tank, similar to what is commonly used for methane digesters.


After hearing of the basic design, community members were broken into small groups and given a series of cards showing related images side-by-side. One card for example showed a built-in masonry stove for the kitchen as well as a free standing metal and concrete stove. Other topics included the finishes on the walls (exposed bricks vs. plaster), ground covering for the central courtyard (exposed soil, grass, brick pavers, or gravel), and even the animal they’d like to see incorporated into the design of the slide (elephant vs. cow). The groups were asked to review the two or four pictures on each card, select the one they would most like to see in their ECD&F centre, and fold the card so that image was face-up. All selections were set on the ground when the group was finished and our team walked around taking photos of the selections and the people in the group. Everybody seemed very excited to be able to contribute to the eventual ECD&F design and there was lots of great conversation about what would be best for their children. There were groups of men, women and children participating in a total of approximately 26 groups.


Once preferences of all groups had been recorded, we explained how the information would be used to improve the ECD&F design and customize it for their preferences. ASA compiled the results to share with the team and will finalize the design based on this feedback. A copy of the results is included below. Many of the results confirmed what we had already assumed, for example 88% of respondents indicated they prefer a built-in masonry stove over a free-standing traditional stove, 92% prefer the latrine to be located far from the front entrance, and 89% would like to have a dedicated water fountain. There were also some results that may necessitate design changes. When asked about preferred landscaping options, the majority of groups preferred brick pavers, which were not included in any of the initial designs. Almost three-fourths of the respondents preferred an option for playground equipment than what we used in this first round of ECD&F construction. Nearly two-thirds of people would rather have a reed ceiling in the stimulation rooms instead of the exposed clay tile roof we’ve been providing. Perhaps most surprising, the majority of groups preferred the S-shaped site orientation over the circular shape because of the feeling of it being more open and inviting. Our initial thought was to always provide the circular shape unless space constraints forced the S-shape. This valuable feedback will help us tailor the design to the local context while also encourage a sense of empowerment and ownership to the community.

 
The District and Sector officials were extremely happy with the event and took a large group out to a celebratory lunch during which they indicated their excitement about the project and appreciation for employing such a participatory process. We committed to sharing the results of the charrette and having ASA visit the site on a weekly basis to direct the site leveling works. UNICEF and the District representative will visit at least monthly to monitor progress.


Friday, June 6, 2014

Video about Architects for UNICEF Projects in Rwanda

Active Social Architecture (ASA) are architects for the pre-primary schools and early childhood development centers I've been managing for UNICEF. As part of an exhibit in Milan, they had this video made. The videographer only had a few days to shoot, none of the ECDs were complete yet, weather was bad, and they didn't get UNICEF permission (which is why they're not mentioned), but the video is really good. Shows off construction techniques in rural Rwanda. Brick masonry buildings with corrugated metal (pre-primary) or clay tile (ECD) roofs. I'm in the background a couple of times.


Video by What Took You So Longhttps://vimeo.com/89417328 


Thursday, June 5, 2014

PBH Weatherization Project

Back in 2010 I lead a project to work with Harvard students to weatherize the Philips Brooks House. It was a great project with over 50 students attending (including the woman who is now my wife, a post-doc at HSPH at the time) and lots of energy saved. The case study won AASHE's first Campus and Student Sustainability Award for “Best Campus Case Study”. Before the big day, I reached out to Jim Merchant of Pirates Lane (http://pirateslane.com/) who agreed to attend and prepare a video. While looking for something else today I ran across the video and was saddened to see that it had far fewer views than my last cat video (our cat Magilla Glub Glub has a Facebook page). Anyway, with that in mind, I'm sharing the case study and link to the video here. Special thanks to the Green Building Services team for all of their work before, during and after the event. Enjoy.

Case Study on AASHE site:
http://www.aashe.org/resources/case-studies/phillips-brooks-house-student-weatherization-project

Video (about 10 minutes long):
https://www.youtube.com/watch?v=YftpU-fkahU


Phillips Brooks House Student Weatherization Project


Institution(s)

Harvard University

Author(s)

Nathan Gauthier, Assistant Director, Office for Sustainability, Harvard University
       

Project Overview

On May 2nd, more than 50 Harvard students took a break from studying for finals and picked up caulk guns to help improve the energy efficiency of the Phillips Brooks House in Harvard Yard. The project was a collaboration between the Office for Sustainability, the Phillips Brooks House Association, the student Environmental Action Committee, and the Faculty of Arts and Sciences Green Program. Student labor was used to implement 23 weatherization projects in the building. The project is estimated to save more than 9 tons of CO2 equivalent and nearly $4,000 in utility costs annually.

Background

The project was initiated when students from the Environmental Action Committee (EAC) approached the Office for Sustainability and Faculty of Arts and Sciences Green Program asking if there was a way to involve students in a weatherization project similar to what is done by Cambridge Home Energy Efficiency Team (http://heetma.com/). The OFS team toured the building and identified nearly 40 practical energy conservation measures for the Phillips Brooks House, which is a 12,800 square foot, 100 year old, brick building. OFS then designed a program to work with students and issued a proposal to the FAS Office of Planning and Physical Resources to work with EAC students to plan and execute a student-lead weatherization event that would significantly improve the building's performance while engaging students in the process.

Project Goals

The primary goal of the project was to engage students and help them feel empowered to make a positive change on their campus. OFS and FAS wanted students to feel vested in the University's greenhouse gas reduction goal and to encourage them to do their part. The students wanted to have their contributions acknowledged and be exposed to the nuances of building operations and the details around how buildings operate and what opportunities exist to improve building performance. Additional goals included reducing the greenhouse gas emissions and operations costs of the Phillips Brooks House. An added benefit was receiving positive press highlighting student and administrative collaboration.

Project Implementation

Of the nearly 40 energy conservation measures identified for the building, more than 20 were selected on the basis that they could be safely and effectively implemented with student labor. The OFS and student planning team began weekly meetings to organize the project. OFS coordinated with Environmental Health and Safety on student safety issues, the Office of General Council on liability issues, Human Resources on labor relation issues and negotiating with the trade unions, and Facilities Maintenance Operations to identify technical resources that would be beneficial to project success. Cambridge HEET, a local non-profit that specializes in home weatherizations, was consulted to share lessons learned and to provide pre- and post-project blower door testing.


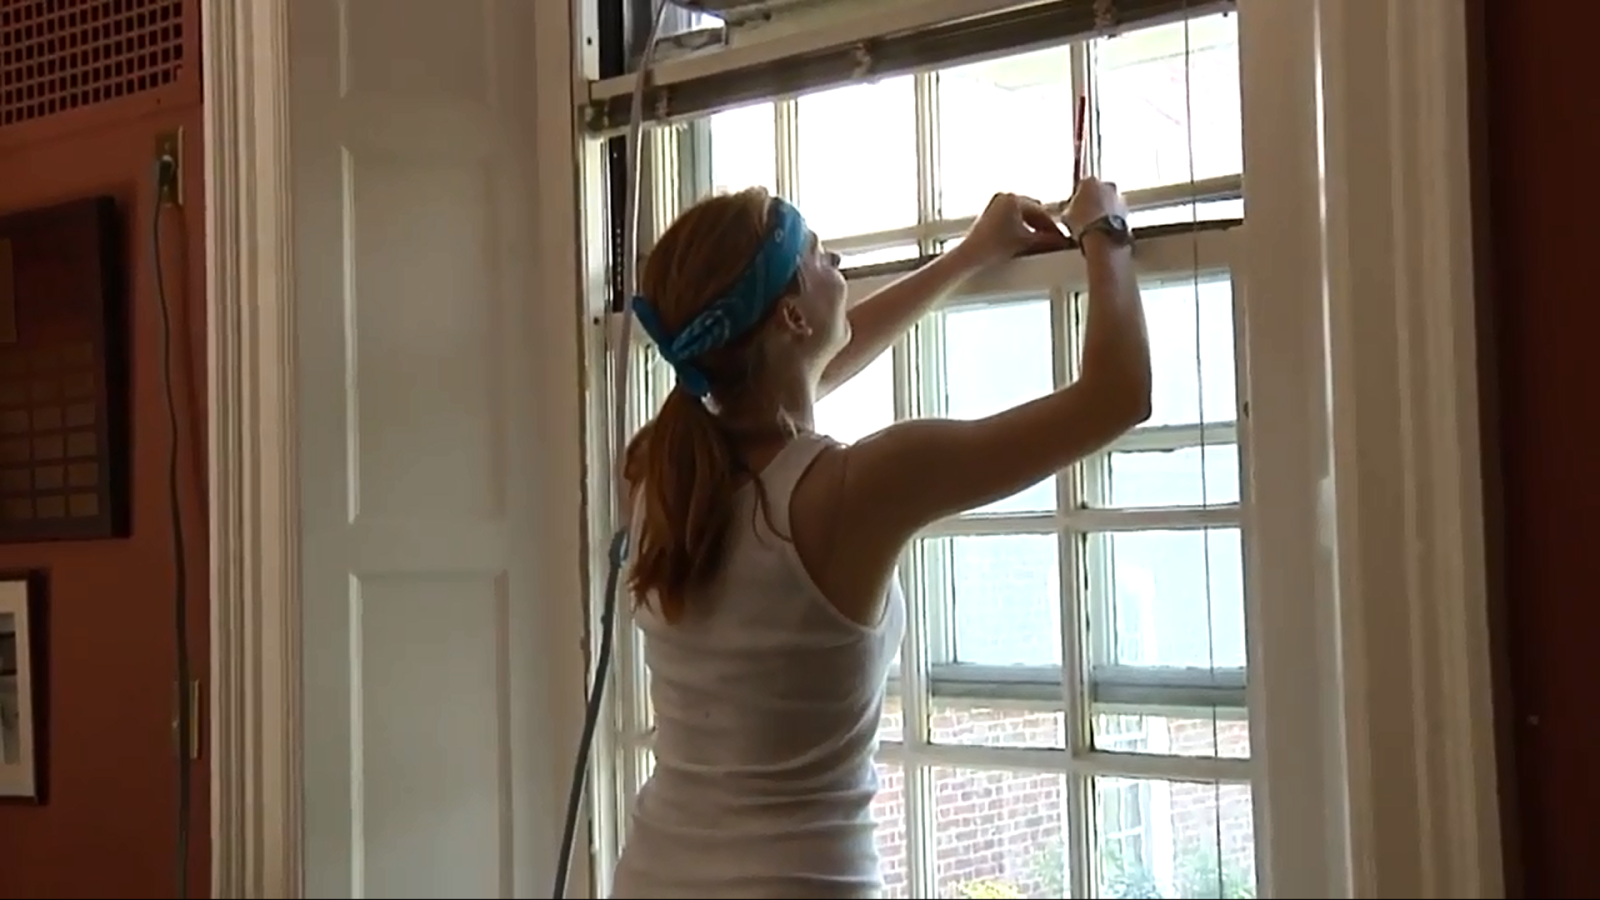
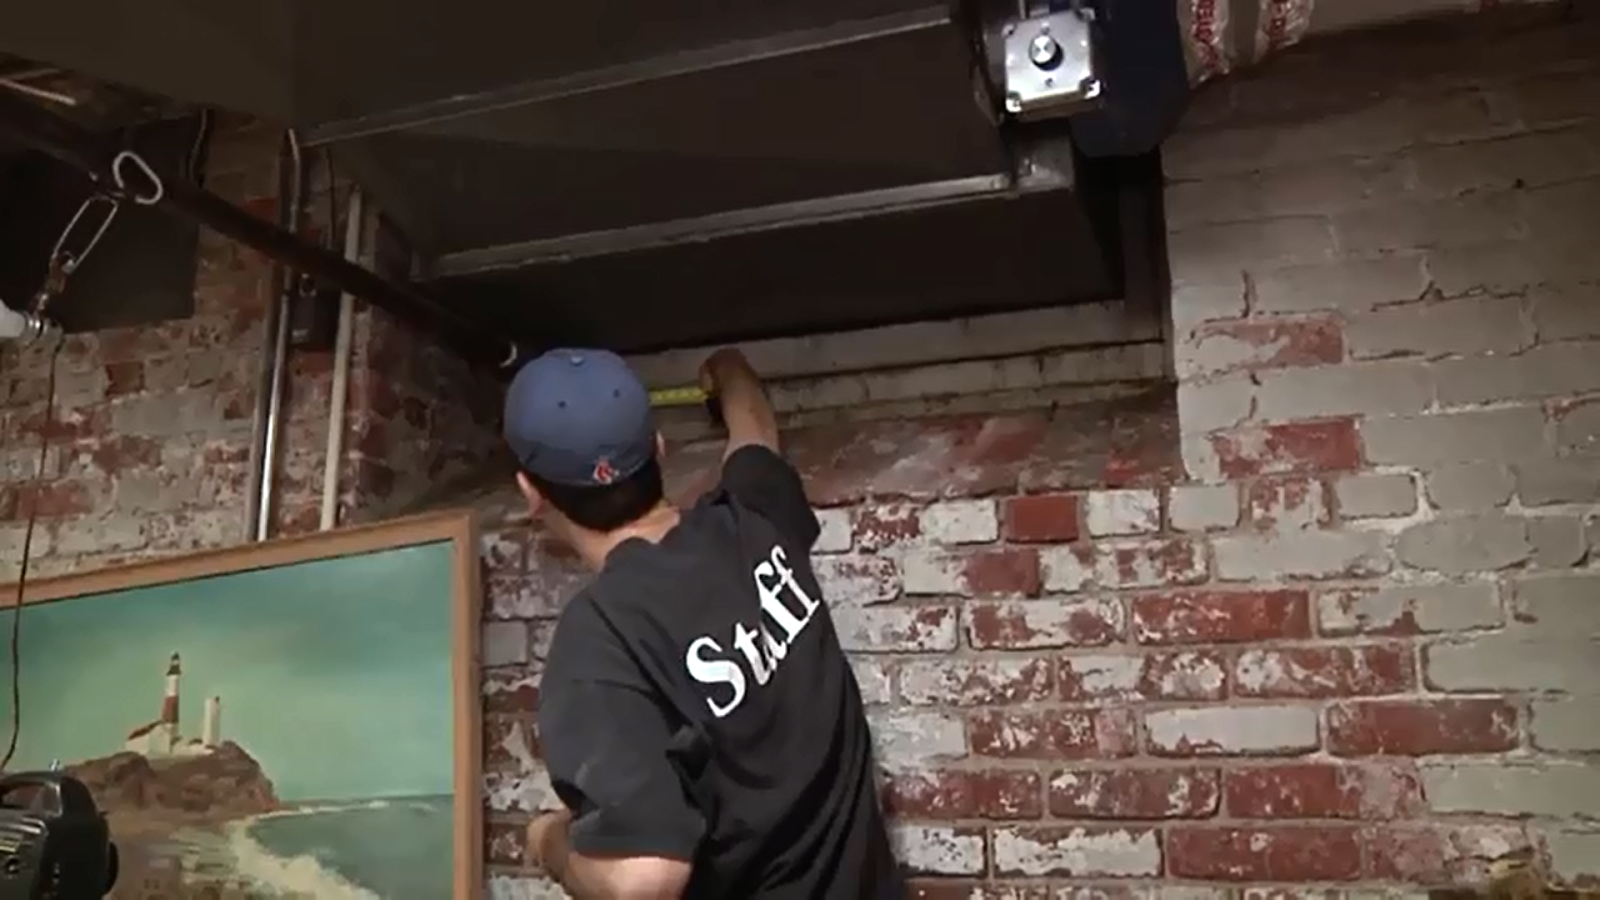
On the day of the event, participants were organized into 7 teams, each led by an OFS staff member and a student leader who had been trained on their tasks ahead of time. The 50 plus student volunteers were trained on safety protocols, tool use, and how to implement the ECMs and then supervised as they performed the work. Projects included caulking storm windows, installing low-flow plumbing fixtures, replacing lamps with compact fluorescents or low-mercury super T8 linear fluorescents, sealing a chimney, installing door sweeps and door jambs, insulating steam pipes, adding smart power strips on computers and timers on water coolers, installing educational signage, and many others. OFS staff was on hand to take photographs and a local videographer responded to a Craigslist ad asking for a volunteer to make a short film. Two full-time interns from Wentworth Institute of Technology worked with OFS throughout this project including helping lead weatherization groups on the day of the event.

Timeline

The project was on a very aggressive timeline because it needed to be implemented before students left for the summer. Students approached OFS and FAS in the last week of February, 2010. OFS Green Building Services walked the building on March 8 and issued a proposal complete with nearly 40 potential ECM opportunities on March 17th. The proposal assumed almost 200 hours of OFS staff time to complete the project with all of the recommended components. FAS approved the proposal the next day (3/18/10) and the OFS team began planning for the event. On March 23, OFS sent the student organizers a detailed description of the proposed process going forward and asked for contact information for student team leaders for the day of the event, as well as for their recommended date for the event and times for weekly team meetings. On March 26 the student organizers provided much of the information requested, though a date for the event wasn't finalized as we tried to coordinate availability of the building with OFS staff availability and student breaks. Student organizers and OFS began weekly breakfast meetings to go over project details, with FAS Office of Physical Planning and Cambridge HEET attending one meeting each to lend their assistance and get updates. By the first week of April, OFS staff and student leaders began visiting the building to put together detailed lists of materials needed to implement their projects and perform practice runs to ensure everybody knew how to perform the tasks for which they were responsible. On March 24th, OFS lead a larger group of students around the building to review all projects identified, including those identified but not being implemented as part of the student project such as demand control ventilation in the lounge area or variable frequency drives on the heating hot water loop. OFS had completed energy calculations for all projects and costed out the materials needed in order to share this information with the students and help them understand the utility cost and greenhouse gas reduction potential of each measure as well as their cost effectiveness. In the middle of April, May 2nd was selected as the day of the event. This was a Sunday during the reading period prior to exams. Invitations to attend were sent to the environmentally themed students groups on April 15th with an online sign up sheet using Google Docs. Materials were purchased during the last two weeks of April. The project took place on May 2, from 11:00 to 3:00, with OFS arriving at 9:00 to start setting up and staying to 4:00 to clean up. Coffee, juice and pastries were awaiting students at sign in and Veggie Planet rice dishes during the lunch break.

Financing

All funding was provided by the FAS Office of Planning and Physical Resources, paid out of their operating budget.

Annual savings are estimated at $3,750 in annual utility costs. We did not quantify the additional maintenance savings from re-lamping all 250 lamps in the building. None of our projects were expected to have an increased maintenance cost. We also did not try to quantify the improved productivity from staff being more comfortable or the benefits of educating students and how this might influence their behaviors going forward.

The total materials cost for the project was $3,300, of which $2,800 was billed to the FAS with the idea that remaining cost went towards tools that could be reused for future projects and would be paid for by OFS. This material value paid by FAS includes the cost of 7 new storm windows, which was not a project performed by the students but was critical to ensure the students caulking the storm window frames knew that their efforts were not in vain. This value also includes the $500 for lunch and $50 for breakfast. Most materials were purchased through Grainger, with additional materials purchased through Energy Federation Incorporated, Home Trends, Watertown Plumbing Supply, Home Depot, Staples, and Conservation Technology.

OFS staff put in 202 hours of time into the project, 192 of which were billed to FAS because of our not to exceed contract agreement. Facilities Maintenance Operations charged for 6 hours of work to have their plumber and pipe wrapper on-site on the day of the event.
Total project costs were $24,043, most of which was from labor.

Project Results

More than 50 students attended the May 2nd event, in addition to the more than a dozen student group leaders, OFS staff, and the Wentworth Interns. The initial, conservative estimates expected a reduction of 9 metric tons of CO2 equivalent of greenhouse gas emissions and $3,750 in utility costs per year. While full verification of the energy reduction may take a year to assess, the building was given a pre- and post-project blower door test to quantify air leakage. The test showed nearly 1,800 fewer cubic feet of air coming into the building when under pressure after the project, which translates to nearly 180 square inches of gaps in the building envelope that were filled… truly excellent results. The bulk of the benefit will be in the winter, when the significant reduction in infiltration will result in steam savings. Everybody responding to the lessons learned survey indicated that they thought the project was very valuable to students and that they hope it is replicated again next year.

Lessons Learned

After the project, a lessons learned survey was sent out to all of the OFS staff and student organizers. 73% of the respondents felt the project was good (4 / 5) and the remaining 27% felt it was excellent (5/5). All respondents indicated that it was a good project that they would like to see repeated.
There were multiple suggestions about broadening the outreach to include faculty and staff, as there were none at the event. The project would have also benefited from having the date confirmed earlier so the outreach could have been done over a longer period of time. Even with very little notice, more than 50 students attended on a Sunday when studying for finals, which seems to indicate there is a lot of interest in this type of event.

Additional time all around would have made the project go more smoothly and would have also likely reduced the cost to FAS as we had to invest significant and possibly redundant resources in order to get everything done on time. While we were able to successfully execute all 23 projects, we had multiple people working on the same or similar tasks for different projects when some of this could have been streamlined if time allowed.

There were a few minor issues during the event with ECMs that didn't go exactly as expected (pipe insulation not quite fitting, dual flush handles not working with all of the toilets, etc.). If we repeat this project, we'll make sure the dry runs in the weeks leading up to the project are more in-depth and can actually confirm the feasibility and the correct parts for all projects. We'll also make sure to order the parts further in advance. One of the packs of lamps we ordered for the chandeliers didn't have the fixture adapter and we didn't have the extra lamps on hand we were expecting.

Another lesson learned was about the door weather seals and students using the drills. It was hard to drill through the steel kick plate without using the more aggressive drill bits, but it was also really hard for students to stop the drill at the right depth. In the future, we'd like some sort of depth guide on the drill to reduce this over-drilling.

Because the blower door test was a bit of an after-thought, we couldn't get Cambridge HEET out on the day of our event. While they were able to come beforehand and afterwards, in the future we would like students to be able to see the actual test and witness the improvements.

 
The film that was made for us by Pirates Lane Video turned out really nicely and putting an ad on Craigslist for a volunteer videographer worked well. We had more than a dozen people volunteer their services. In the future, we'd like to have an OFS staff walk around with the videographer to make sure he's able to film all of the projects. We would have also liked filming of the predatory planning meetings if possible.

We created educational signage and a poster summarizing all of the projects for the students. These sorts of occupant engagement efforts partnered very well with the more typical energy conservation measures and helped make for a more complete event.

We were able to get reusable cups and glasses from Harvard University Hospitality and Dining Services and used all compostable plates and silverware (with composting bins that the OFS staff took home afterwards and brought back to work on Monday). All of the dishes from Veggie Planet for lunch were vegetarian. A number of students commented on appreciating that we made sure to use sustainable dining practices and this is of course something we'd like to do again in the future. A number of people also mentioned that it might be easier to eat pizza instead of rice dishes while outside working.

There were also comments about the project being more for awareness than energy savings, and it may have been nice to have contractors there actually implementing some of the more significant energy saving opportunities at the same time. We identified another 15 to 20 projects that had good payback and would save significant energy, but would require a professional contractor to implement. It might be worth combining the installation wtih the student work in the future. It is also worth noting that the vast majority of the project costs came from planning the weatherization event and not from the actual materials. Using student labor to thoroughly weatherize a building in this manner does not seem to be the most cost effective way to get the job done assuming you have to pay for the staff time needed for planning. The benefits, of course, go well beyond the immediate energy savings from the ECM projects.

There were a few ECMs that really only allowed a couple of people to work on them at a time. In order to engage more students, we would have needed more team leaders and possibly more tools (such as drills). This was only true for a couple of projects like the plumbing projects or door sweeps, but something to keep in mind. Trying to keep 50 or more students engaged simultaneously requires a lot of advanced planning and a lot of knowledgeable leaders.

A critical lesson to share is that early coordination with all stakeholders is critical and that doing so allowed the project to happen without any last minute concerns or hang ups. It requires motivated student leaders, knowledgeable sustainability staff, and facilities leader willing to invest in this kind of project (thank you Jay Phillips). If coordinated with all parties early, potential obstacles can be identified and solutions suggested.

Everybody involved felt this project was a success and that future projects would be even better. It is difficult to succinctly share all of the lessons learned, but the OFS team is very optimistic that if we were able to do a similar event in the future they'll be even more successful than the first.

Quick Look at Embodied Energy of Two Roof Solutions

A friend who is proposing a vaulted roof made from compressed earth blocks / tiles asked me to take a look at embodied energy between his proposed solution and a typical concrete roof. My response is below. Note the initial roof area, thickness, and materials for both the proposed and typical roof were provided by the friend. It appears that the compressed earthen blocks have significantly less embodied energy compared to a concrete dome solution. Another comparison might be the domed earthen blocks to a flat (less area) concrete roof, but this is not represented below. Let me know if you have any questions. Nathan Gauthier

Here is a summary of your emissions and embodied energy comparisons for the two roof options. The earthen dome option has significantly less embodied CO2 emissions (81% less). See below. All conversion factors come form the Inventory of Carbon and Energy (ICE v2.0) put out by Bath University.

 
Most of your savings comes from the tile roof not having steel reinforcement (very high embodied energy compared to other materials) and the earthen tile roof thickness (150 mm) being much less than the concrete (250 mm). Sand, aggregate and cement have the same CO2 per unit for each roof, but there is more volume / mass in the thicker concrete roof. I had to make a number of assumptions (type of lime, strength of concrete, percent recycled content for steel, etc.) but they don’t have a significant impact. Detailed breakdowns follow:
 

All volume to mass conversions from: http://www.simetric.co.uk/si_materials.htm
 
I didn't have Rwanda-specific emissions data, but sand, water, aggregate will all be collected locally with hand labor (aggregate will be crushed by hand), the earthen blocks are hand pressed (machine originally from South Africa), and concrete, steel, and anything else that is imported will come by truck into Rwanda and probably by boat to Mombasa, Kenya. 


Monday, April 28, 2014

Quality Control - Fired Brick Masonry

Working on early childhood development centers in Rwanda has had me inspecting a lot of masonry construction. There was very little quality assurance put in place when the projects began, so for the most part it has been regular inspections, identifying mistakes, demolishing parts of walls, and re-building correctly. Going forward, a robust total quality management plan will be introduced form the beginning, complete with minimum qualifications, written instructions and signage, assigned people responsible for quality, checklists (pre-construction, during construction, and post), mock-ups, etc. Here are some of the most common errors.
 
 
This wall shows what is supposed to be a Flemish bond, but the header bricks (the single brick running perpendicular to the wall) are cut. The masons do this because the dimensions are bad / inconsistent. If they put the headers in so they are flush with the outside of the building, then there are large divots on the inside where the brick isn't long enough. Ideally, the bricks would be long enough to be flush on the inside and outside (as long as two brick widths plus mortar). We've asked them to pre-select the longest bricks and use them for headers and then to center the headers so there is a small divot on either side. Once Identified as a problem, I prepared signage to have on sites as a teaching tool / prompt, but more needed to happen at the beginning of construction.


Another common mistake is bad grout. We're getting very inconsistent mixes (bricks can often be easily removed from walls after the grout is dry). One reason is nobody uses lime, so it is just a small amount of cement and some very dirty sand (often not river sand and they haven't been washing). Regardless of the mix, instead of 1 cm mortar joints, we're seeing as much as 5 cm. This is partly because of un-skilled / un-trained masons, but also because of bricks with different dimensions than assumed by the architects. The architects have shown every single brick in their drawings and when foremen see a certain number of rows of brick under the window sill with specific dimensions given, they are increasing the amount of mortar per row to get the bricks to the level shown on the plans. Going forward, we need to clarify that the mortar joint dimensions are critical (1 cm) and that heights and number of brick courses shown on the drawings for some items, like window heights, have some flexibility.


Finally, the rebar in masonry buttresses and columns is new for most masons and we've seen lots of problems. Ideally, the two rebar are spaced 10 cm apart, centered over the buttress or column, and the bricks are woven between the rebar. We're getting rebar poorly set in the foundation, so getting bricks between them / incorporating them into buttresses is difficult. Often, the masons will push the two rebar together and treat them as one because it is easier to lay brick around, though much less structurally secure. Even when it is pointed out that rebar are in the wrong position within a column foundation, we have seen the masons bend the rebar at the bottom to get them where they should be so the entire column becomes wobbly as there is slack in the rebar (and the grout isn't very sticky). 


Saturday, April 19, 2014

Evaluating Natural Daylight Levels

After visiting one of our new early childhood development sites, we noticed the inside of the stimulation rooms (classrooms) were a little dark. They buildings are supposed to be naturally daylit, but nobody on the design team knew anything about estimating daylight or optimizing the design. Subsequently, I’ve reviewed the design and taken light levels in the field. My initial conclusion was that the light levels in the center of the rooms at the floor level often met or exceeded recommended levels (primarily because the windows extend very low to the floor below typical vision glazing and light reaches this spot from multiple directions), but at 1 meter off the floor and in many of the corners the levels were below recommended levels. The Illuminating Engineers Society (IES) recommends 50 foot candles (500 lux) on the writing surface for schools for visual comfort and productivity. Based on the 4 sites I measured, the levels with full sun are typically:
 
 
20 - 30 FC in centre of room at 1 meter
60 - 80 FC in centre of room at floor
5 - 10 FC on bench in “front” of room

 
With these light levels, activities low to the ground in the center of the room (building is designed for children 0 - 6) will be well lit with daylight on sunny days and most overcast days, but children in the corners of the room will have less light than ideal. While a couple of the sites have electric lights available to help alleviate this condition (two, 13 watt CFLs without a fixture), we should advise teachers in all sites to focus art projects, reading, and other visually sensitive tasks away from the bench area.
 
There are a number of potential ways to improve the lighting levels if doing a re-design, as well as some options to improve levels in the already constructed buildings. We decided to go with painting the interior brick white to improve reflectance. Each site has three stimulation rooms so we painted the two longest walls white from floor to ceiling in two of the rooms at one site and re-did our testing. Light levels were almost double in the painted rooms and significantly improved light levels. All sites have since been painted (some not yet to the ceiling as in the image below). While the bench area is still darker than is ideal, the rooms are much improved as a result. At other sites that are nearing the end of construction, we're going to remove some of the brick vent holes at top of the front wall and replace with a framed, translucent plastic window, which should bring the daylight levels up to recommended levels.
 
The lesson learned in this exercise is that daylight modeling or at least crude daylight factor calculations are critical for buildings intended to be naturally lit.
 
 
Extra info (sent to my supervisor when trying to raise the issue):
 
An easy way to evaluate natural lighting is daylight factor (DF), which is the ratio of outside illuminance over inside illuminance, expressed in per cent. The higher the DF, the more natural light is available in the room.
 
The general rule is a room needs to achieve at least 2% DF to be considered daylit, though this is still considered gloomy and electric lighting is needed most of the day. From 2 to 5% the daylighting is better, but electric lighting is still needed up until 5% for optimal visual comfort.
 
Using the crudest rule of thumb method of estimating daylight factor (DF = 0.1 * Glazing Area / Floor Area), it looks like we would just be above the 2% “daylit” threshold as we get 2.7% DF (13.7 m2 glazing / 50.8 m2 floor). Unfortunately, this is overly optimistic in our case for a number of reason. Daylight factor is the sum of three components: direct lighting component (DC), externally reflected lighting component (ERC), and internally reflected lighting component (IRC) such that DF = DC + ERC + IRC. The rule of thumb metrics assume typical office building values for all variables. There are a few problems with this method as we need to account for:
 
  • Many of the windows and one door are shaded from most direct sunlight by roofs above
  • All of the masonry vent openings are deeper (22 cm) than they are tall (8 cm) so let in no direct sunlight most of the day
  • Most interior surfaces are dark and non-reflective and standard calculations assume partially reflective white ceilings and light colored interiors
 
As a result, most of our windows and openings have 0 direct lighting component because of the overhangs (good for avoiding heat gain, but also less visible light), we have very little externally reflected daylight since there are no surrounding buildings other than the others we’ve built with non-reflective exterior surfaces, and we have little internally reflected lighting as our interior materials (especially the ceiling) are darker and less reflective than a typical office. We do have the benefit of very clear glazing in the windows with higher than typical visual transmittance (VT) and of course no glazing in the ventilation openings.
 
Multiple field measurements on the overcast day in Site A showed a range of 1% to 2% DF in the center at 1 meter and about 2.5% to 5% DF in the center on the floor. DF calculations at other sites were not possible as it needs to be overcast and low enough direct sun levels to not overload the meter, but they confirmed the Site B assessment by showing full sun measurements in line with what was expected. 
 
To get up to the 5% daylight factor for the entire room (suggested target), we’d ideally incorporate a combination of increased opening size, especially up high where the contribution to daylight factor is greater, and lighter and more reflective interior surfaces. Even adding the colored paint in the current rooms has already brightened the space a lot compared to the pre-painted condition. We’ll see the impact of the white walls in Site A.